 |
| Another spherical panorama from the Grotto Area on Georgian Bay |
 |
| Starting Point : Raw Images |
To minimize errors and headaches when stitching, you should be using a nodal tripod with the rotation fixated around your entrance pupil for the camera/lens combination.
 |
| Hugin Screenshot showing control points |
I start off in Hugin putting the image positions in. Since I shoot every spherical with the same 'recipe' for my particular lens, this part is easy. 4 images at a minus 60 degree pitch, one every 90 degrees, then 8 images at a 0 degree pitch, one every 45 degrees of rotation, and lastly another set of 4 at plus 60 degree pitch same as the first, every 90 degrees. Plug that information into Hugin and you should see something similar to the image above, but without the control points.
Then I go through image pairs and put in one or two control points for each, it just helps the computer from getting confused when trying to stitch the rest. This usually gets me about 60 control points for my set of 16 images.
 |
| the 360 version shown in an 'equirectangular' format |
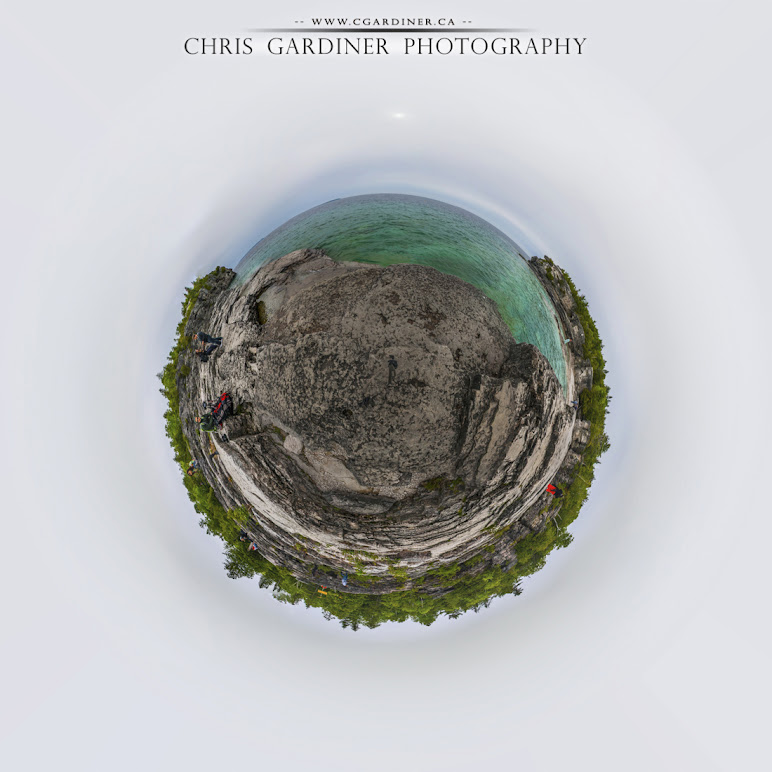 |
| the finished version turned into a sphere (sky on the outside) |
Finally, with your fully spherical panorama, you can bring into photoshop for the final step of the journey. The hard part is over. Now, in order to make your tiny world, flip your image upside down.
You could make a tiny world the way it is now, but instead of having the sky on the outside of the frame surrounding your tiny world, it would be reversed, and the sky would fill the sphere in the centre, and your landmass would stretch from the outside edges to the centre all around. Maybe it suits the look you're going for. Now, go to image size information, and if you're working with a true equirectangular spherical panorama (360 degrees of view along the bottom, and 180 degrees of view from bottom to top) you should have a picture that is exactly twice as wide as it is tall. Make it so the width is equal to height. You don't have to do this, but you won't have a sphere in the end, you'll have an ellipse. So now you have a squashed, upside down landscape. Last step, go to your Photoshop filters menu, under distort find "polar coordinates". And thats it.
Enjoy!
C Gardiner Photography | Promote Your Page Too