Model Shoot: Kaylynn

I just had a shoot with a lovely, young, local model, Kaylynn. We themed our shoot around popular "Lange Girl" Advertisements. So I found it is a good opportunity to share some of my lighting that I used for these photos.

Portraits demand careful attention to the lighting, and studio portraits demand further attention to the lighting as you are responsible for controlling it all.   No ambient to balance for, just flash powers.


So with that said, a lot rests on the photographer's shoulders, as your lighting can make or break your shoot.  When you control all the light it is always best to shoot in full manual.

Initially, I set my camera the same for every shoot. Usually ISO400 f/8 and 1/200sec.  Start firing some test shots now.  Obviously there is no right or wrong way to light a person.  There are things that work, and things that don't however.  So you will just have to fiddle with the lights until it looks right.

Consider there to be two types of light. Soft and Hard.  Hard light appears to come from small light sources - your on camera flash is a hard light, any speedlights without modifiers are hard lights. Hard light 'sculpts' so to speak.  It can work well on portraits when you have strong lines to define, like muscles, and usually make for strong contrast and strong shadow lines. I had one hard light in this shoot:  the rim light that is at camera right, and behind the model pointed towards her and the camera.

Soft lighting is just that - soft.  Spread out, like what happens to the sun when it is diffused through an overcast sky.  Do something similar to a speedlight for a similar effect.  I used two umbrellas as my soft lighting in this shoot.  One large, kept up high and camera right as the key light - or main light. And a second smaller umbrella moving occasionally, but usually below or left of camera pointed towards the model. This second one acted as fill.  If you want to showcase beauty in your subject, usually soft light will be the choice you want to make.

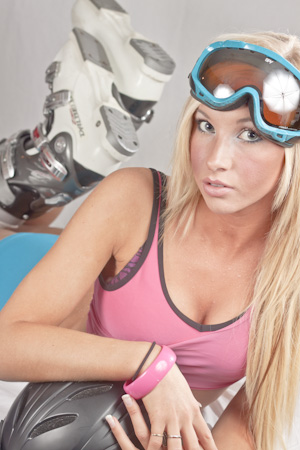
As far as the power levels; the rim light was at the highest power of the three flashes. This gives a bright rim on the right hand edges of the model, and especially on a white background, really helps to separate her from it.  The large umbrella key was the next highest in power, providing most of the light on the front of her body. This was in as close to the model as possible without interrupting the frame.  Lastly the fill light umbrella was just there to fill in the shadows created by the key light, and so was kept a stop lower than the key.

At no point did I have a light dedicated to the background.  This is slightly unusual for me when shooting on white especially, but I needed my three lights on the model.  Luckily there was enough light bouncing around the room to keep the white background looking half decent.   That is where the bonus to shooting on black is, and due to that, I feel the shots from this shoot on black are much more engaging than those on white. 


So there you have it,

Not much to this post, just sharing some of my techniques from my most recent shoot.  If you would like to see more from this shoot, they can be found here. There is only six now, but you can expect several more in the coming days. It has been a very productive week around here.


[Sorry - this blog may mention a lighting diagram, which has since become a broken link with the original file lost, my apologies! - November 2012]

================== Find more photos @ www.facebook.com/cgardinerphoto --------