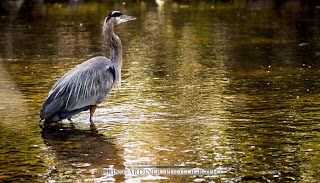
It's a crucial step to editing that is often taken for granted. Flagging your photos. It can mean the difference between making good use of your time, and wasting time spinning your wheels. It's one of those things that can help you with something trivial, like picking the best of a bunch of heron photos, or something serious like getting through editing 1500 wedding photos before the one you are shooting next weekend.
So read on for some of the insight to my workflow;
Whether you are using Lightroom like I do at one end of the spectrum, or rocking Windows Photo Gallery on the other end, you already have everything you need to sort through photos like a boss. It's easiest to start with sorting into three categories - BANGER's, BRUTAL's and everything else. Banger shots are what I sometimes call the great ones, brutals, are just that, get 'em out, and everything else is where the bulk will fall.
After getting a full shoot's worth of photos on the computer, whether it's fifty photos of a heron, or 1500 of a bride and groom, I like to pass through them all once (at high speed) on a computer screen. Rarely will I flag anything here, I am looking at the bigger picture and feeling out where my best and worst compositions were.
 |
| This was my first 'clear favorite' after shooting. |
In lightroom, I'll filter my view by removing anything down-flagged, I only want to see what may be worth my time. Pass through again, a little slower speed than the last time, I already have a mental picture of what might have been one of my favorite compositions. If it jumps at you in a good way, flag it up. If you have to stop and think about it - leave it as it is.
That's where I like to take a break. I have my clear favorites picked, and I won't be seeing any more of the garbage. Try to take 24 hours, or at least sleep on it before the next step.
When you go back to it, look at only the unflagged, or 'everything else' section. Don't view any good or bad ones. Then go through and do the same thing as you did the night before, upflag a few more clear favorites, and downflag anything else that maybe sticks out like a sore thumb.
Now, switch it all up, look at only your 'upflagged' photos. You might see a few doubles - that's okay. I like to do one pass through these and make sure everything here deserves to be. And after that, all your photos are flagged and you are ready to start working on the editing of the appearance of your images.
Flagging is one of the best ways to isolate your best work and share only that, and one thing a lot of good photographers have learned is that you should only share your best. A lot of times that means choosing just one out of a hundred. Your top 1%
C Gardiner Photography | Promote Your Page Too

